Published 16th May, 2026
Most garden rooms have one thing to work around. This one had five, and every one of them was non-negotiable before we had laid a finger on it.
The house is a listed 19th-century terrace in Hackney. Building anything in the garden needed planning permission, and the owners had already secured it by the time they came to us. That is usually good news. Here it also meant the design was fixed, the roof had conditions attached to it, the tree in the garden was protected - and the building itself was the only route to the plot.
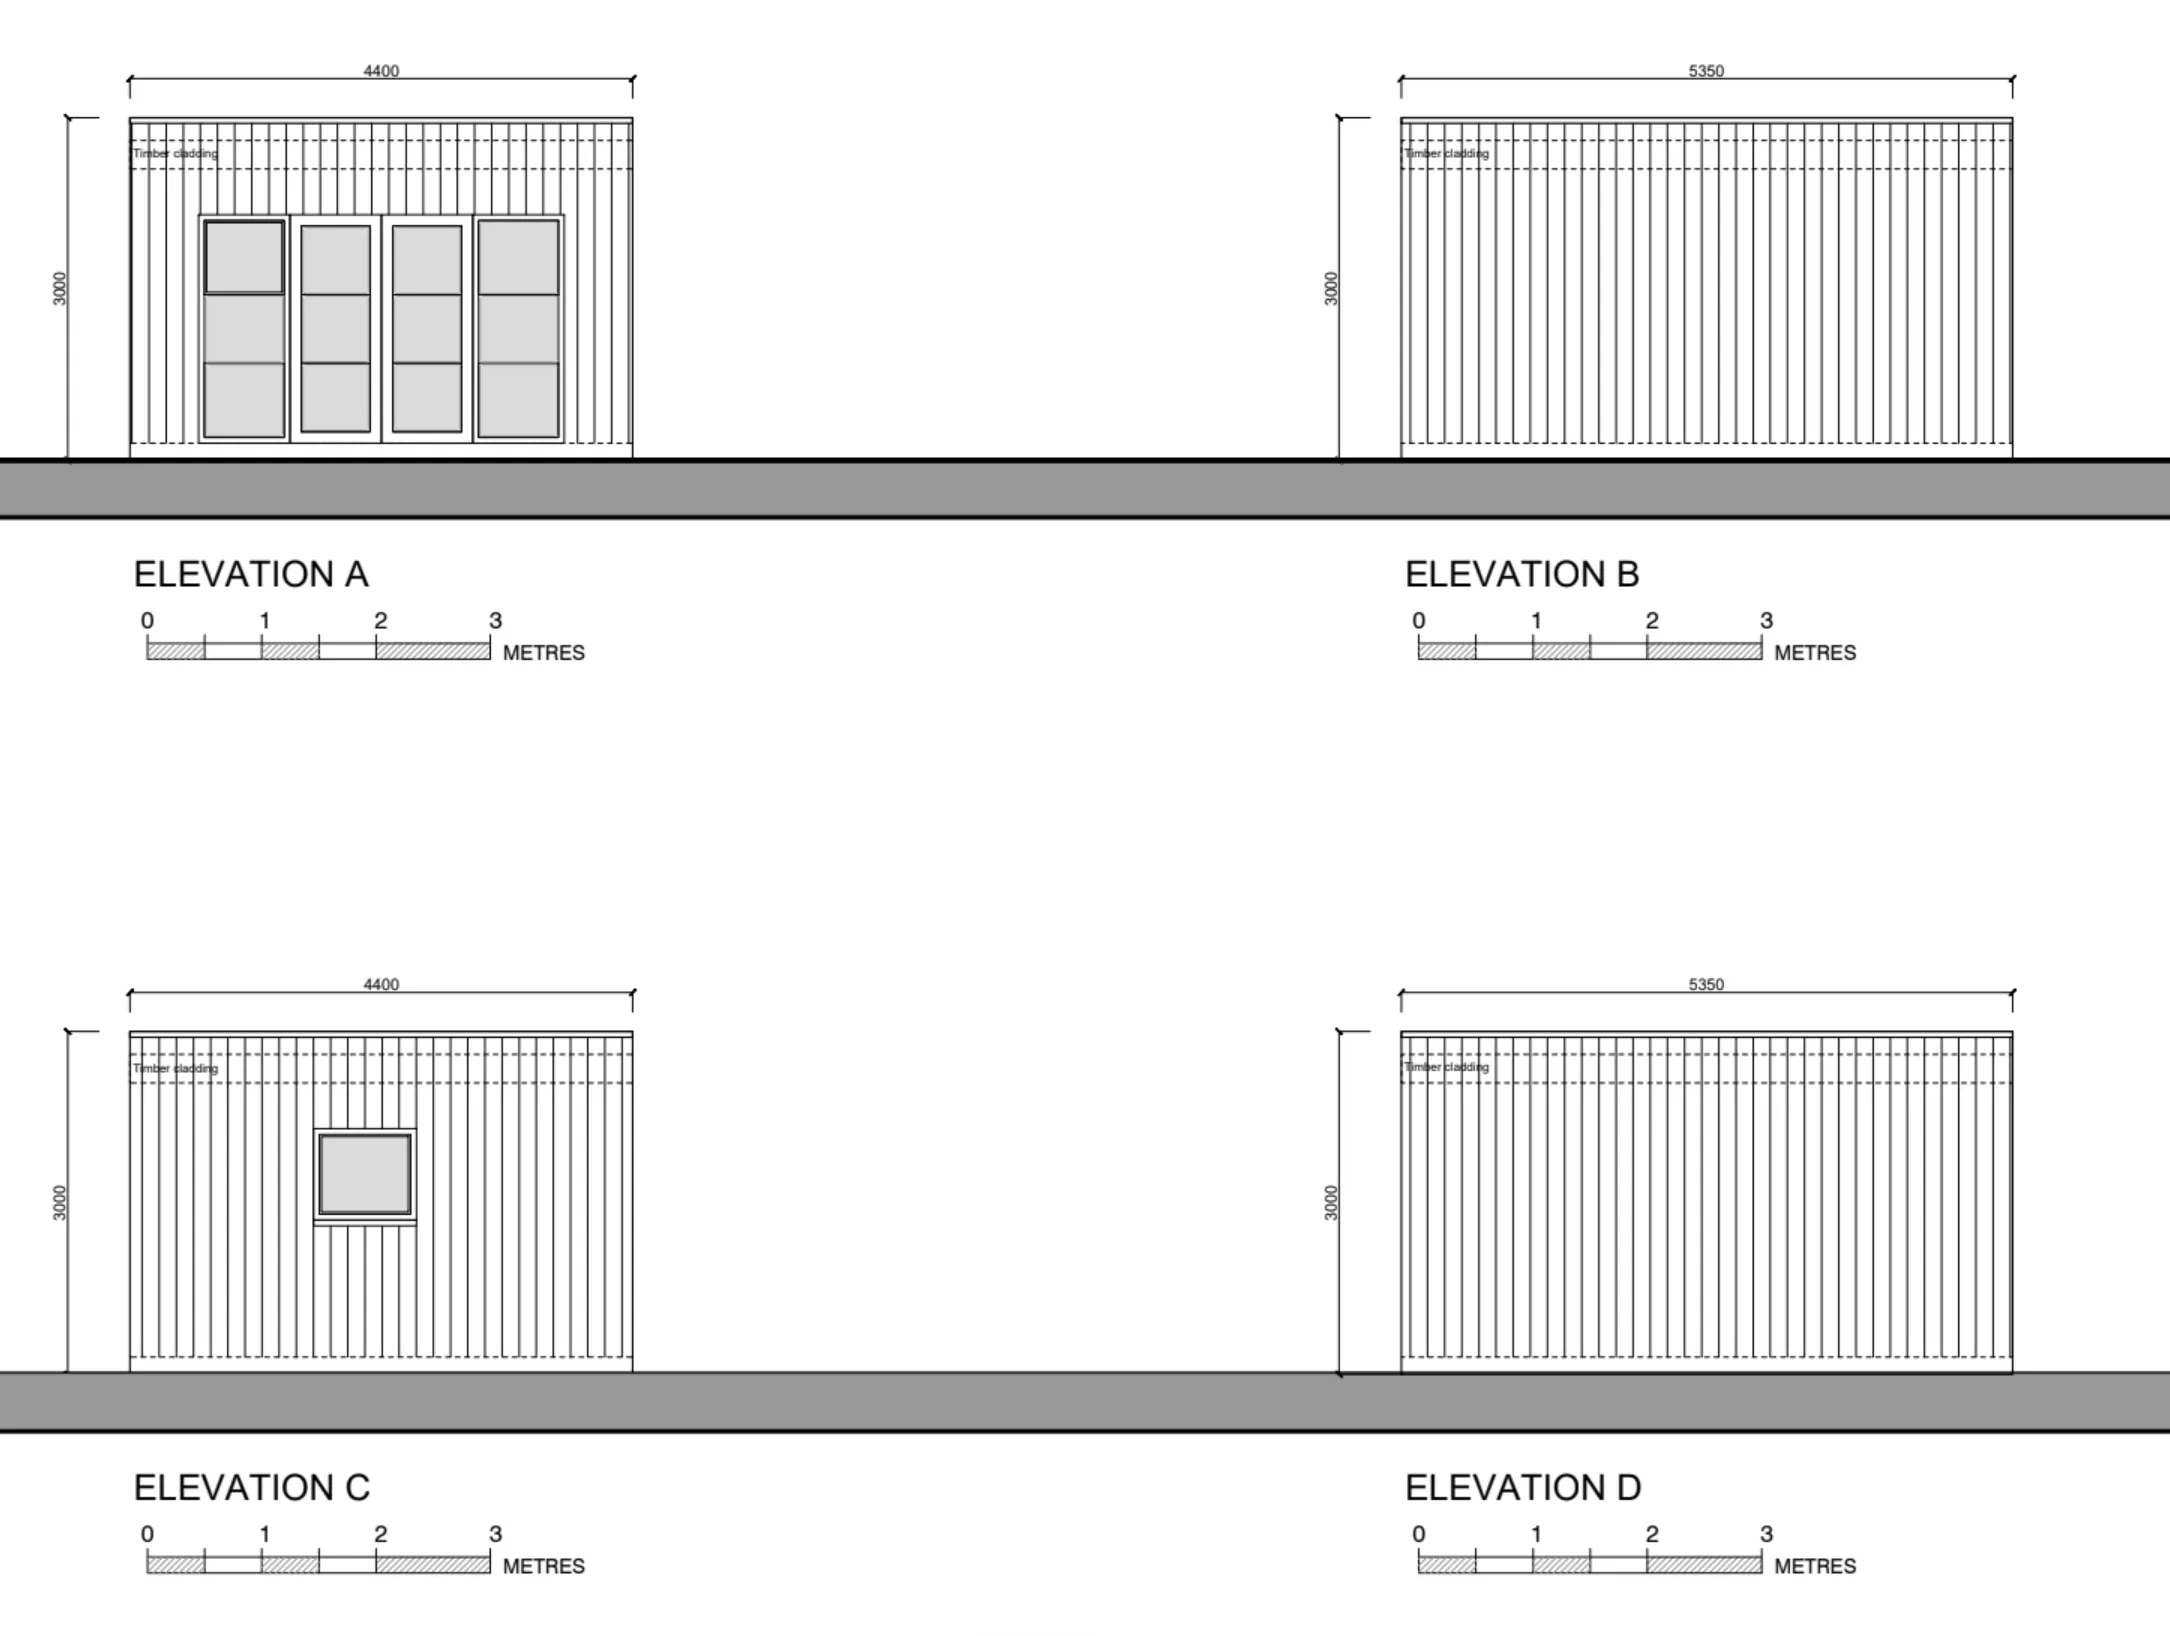
The finished room is 4.4m by 5.35m and 3m tall. Here is what it took.
A Design We Were Not Allowed to Change
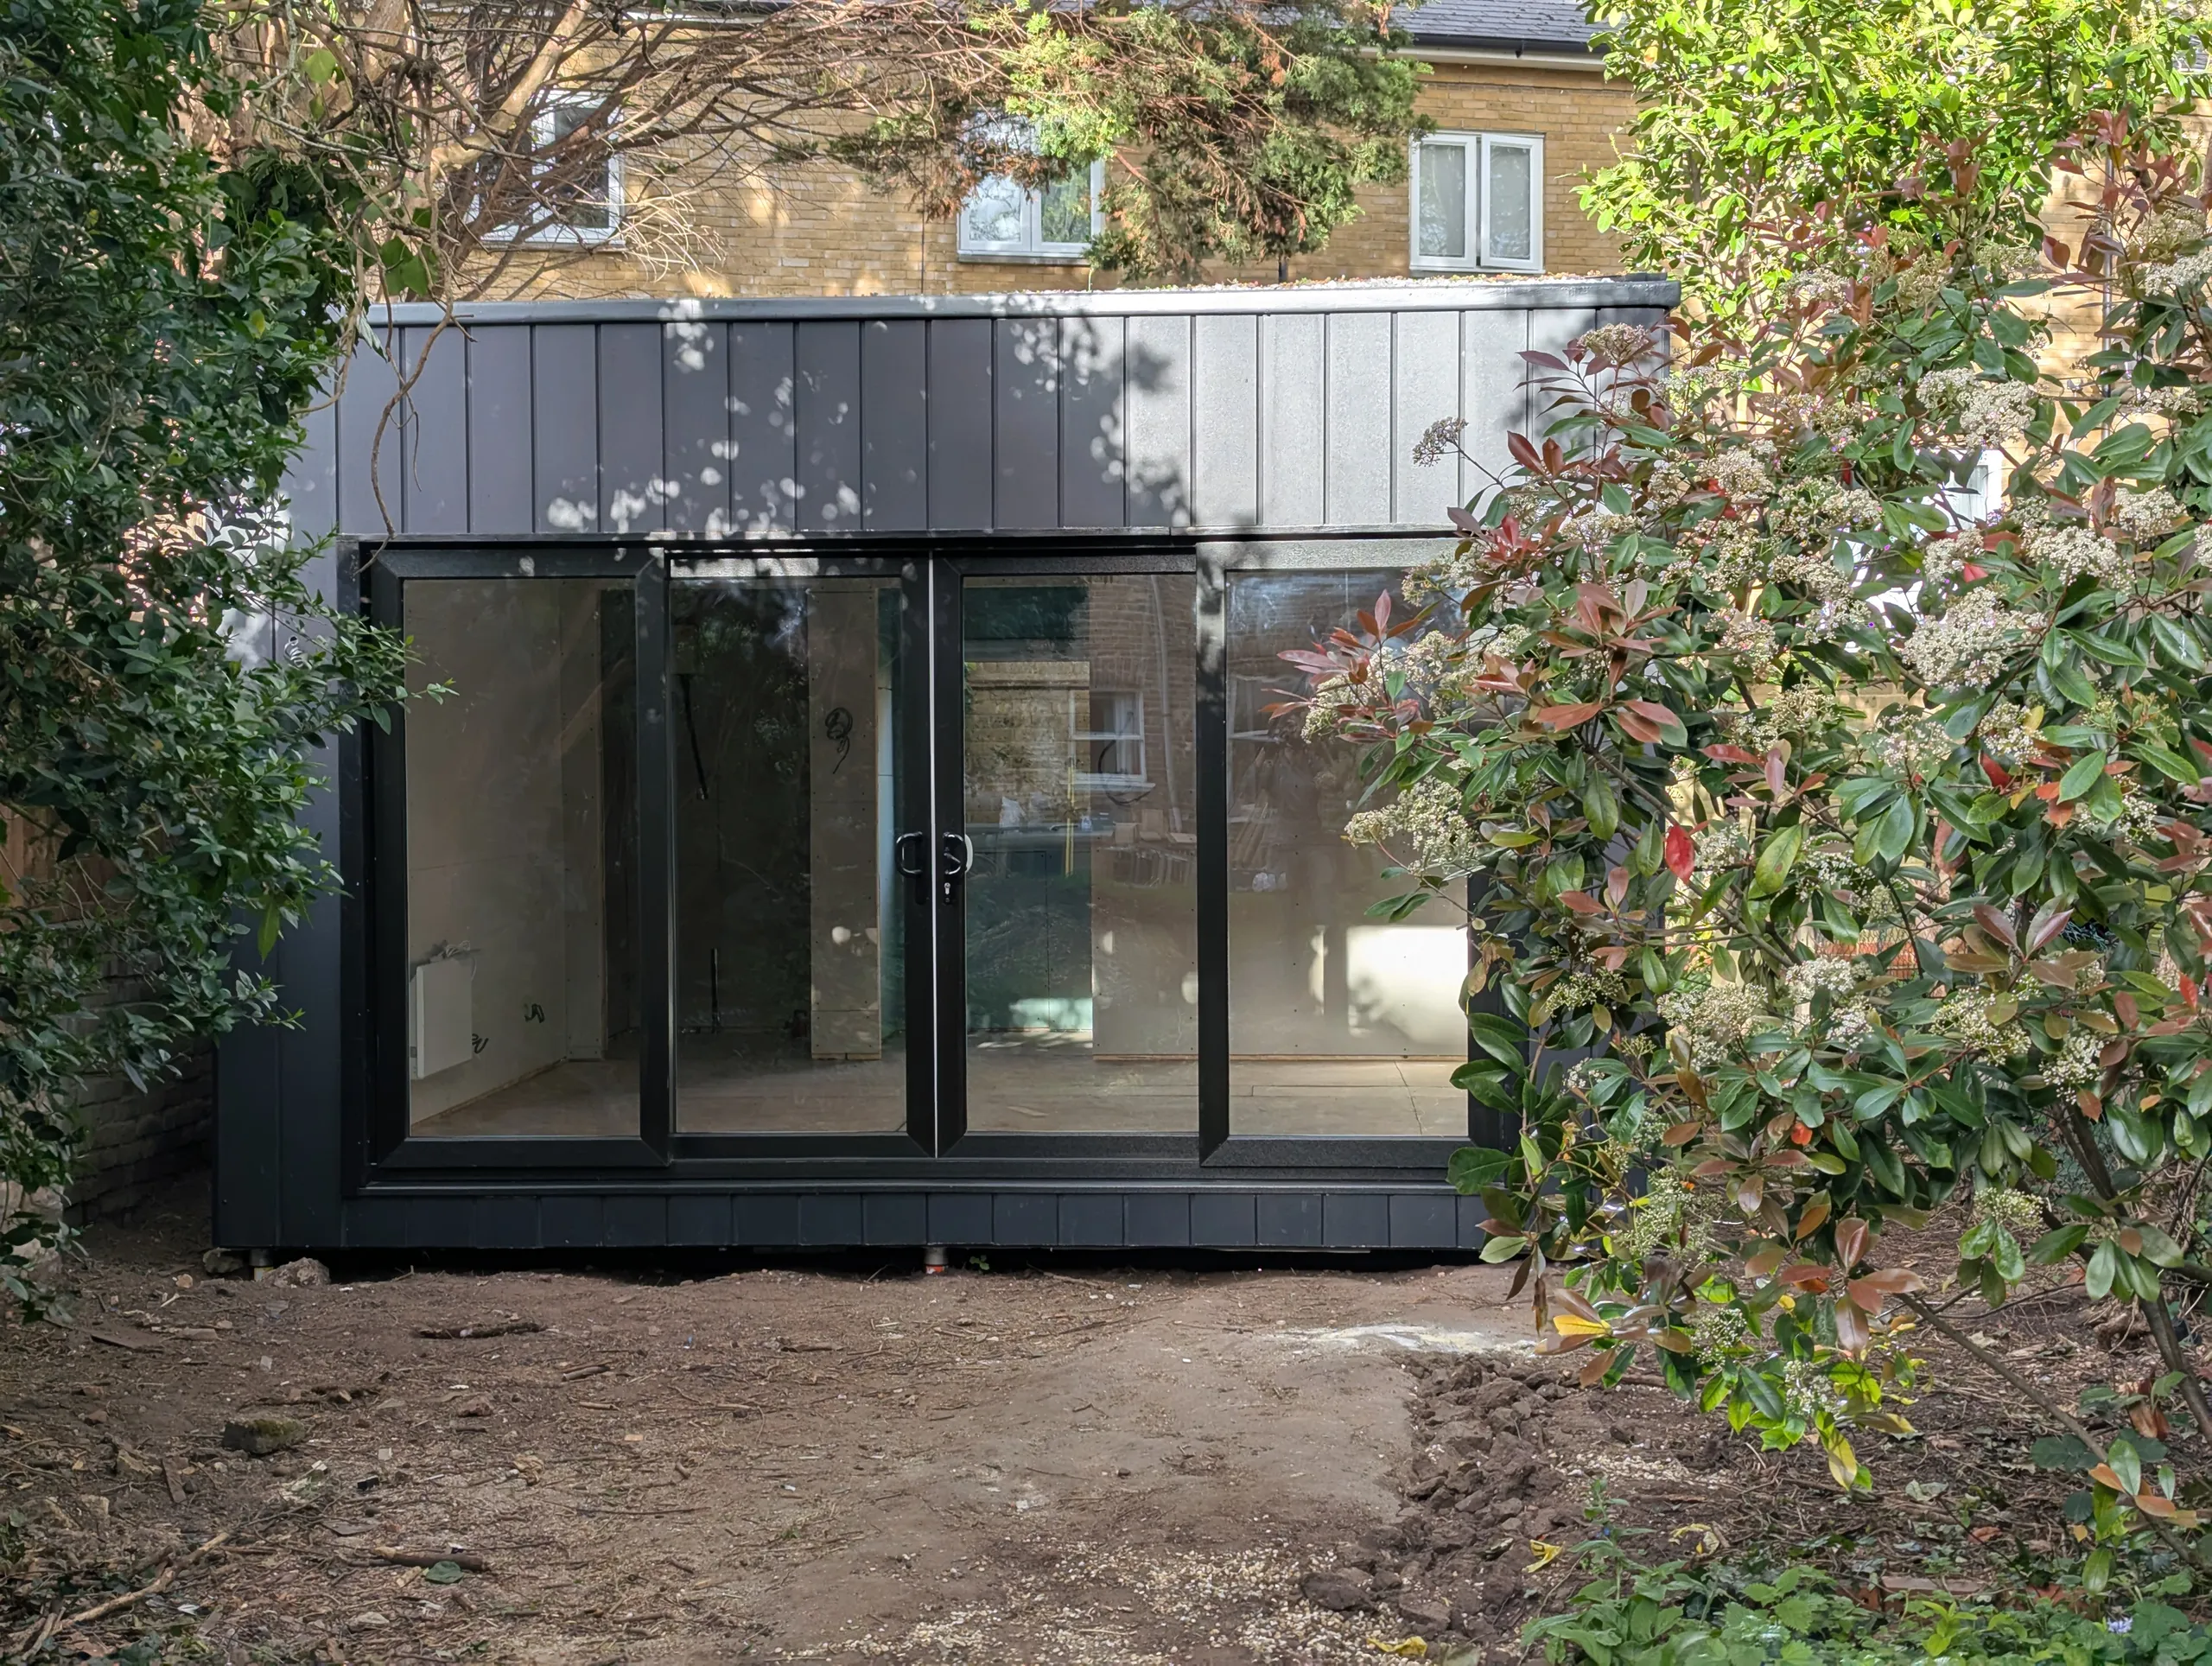
Planning permission on a listed building does not approve a garden room in the abstract. It approves that garden room: those elevations, that shape, that height. The drawings the owners had permission for described a cube. Flat sides, flat top, no overhang anywhere.
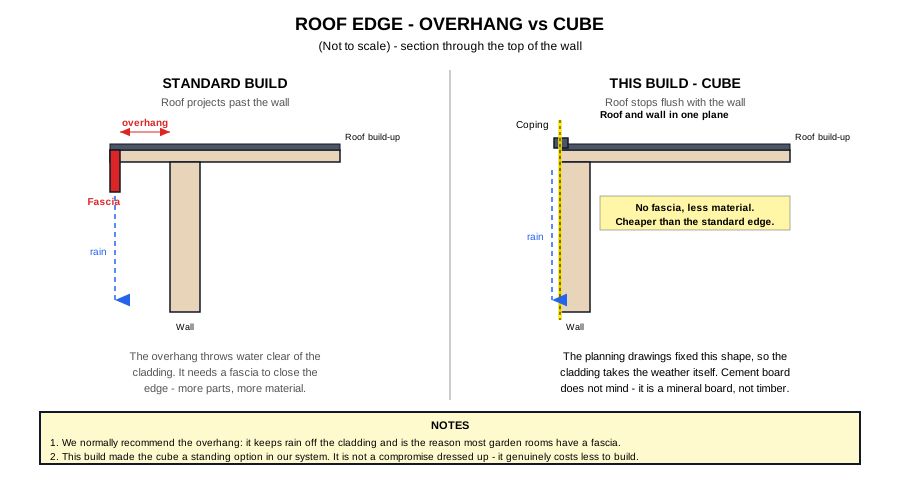
That was a problem, because our system did not build it. We normally recommend an overhang: the roof projects a little past the wall, throws rainwater clear of the cladding, and is closed off with a fascia. It is the reason most garden rooms have a fascia at all. The approved design had none of it.
So we built the cube, and then did the more useful thing: we made it a proper part of the system rather than a one-off. It is now an option any customer can choose. The pleasant surprise is that it is cheaper than our standard build. No fascia means fewer parts, and a roof that stops flush with the wall uses slightly less material than one that projects past it.
Over 15m², So It Had to Stop Burning
The interior exceeds 15m², which puts the building into territory where it has to be constructed of substantially non-combustible material. On a listed building the owners decided not to argue the margins. They invested extra in compliance to make sure no question could ever be raised about it later - which, when the house itself is protected, is a sensible thing to buy.
We met it with STS cement board sheathing on the frame and cement board cladding outside it. Cement board is a mineral product - it does not burn, and it does not care that there is no overhang keeping the rain off it.
The awkward part of that requirement is the word "substantially". It has no number attached to it. A garden room is never going to be entirely non-combustible - it is a timber-framed building - so the question is always how much of it has to stop burning before the word is satisfied, and nobody will tell you.
So we answered it the only way we find useful, which is to measure it. Our calculations put over 50% of the finished building's mass in Euroclass A non-combustible materials. More than half of this building, by weight, will not burn. We are not aware of a reasonable reading of "substantially" that this fails.
Being able to say that at all is a side effect of how we work. Because every part of the building exists in the model before it exists in the garden, the materials list is not an estimate - which means a question like "what proportion of this thing is non-combustible?" is arithmetic rather than opinion.
It also happened to be exactly what the owners wanted to look at. The compliance choice and the aesthetic choice turned out to be the same choice: a flat, sleek, modern black exterior.
A Green Roof With Conditions Attached
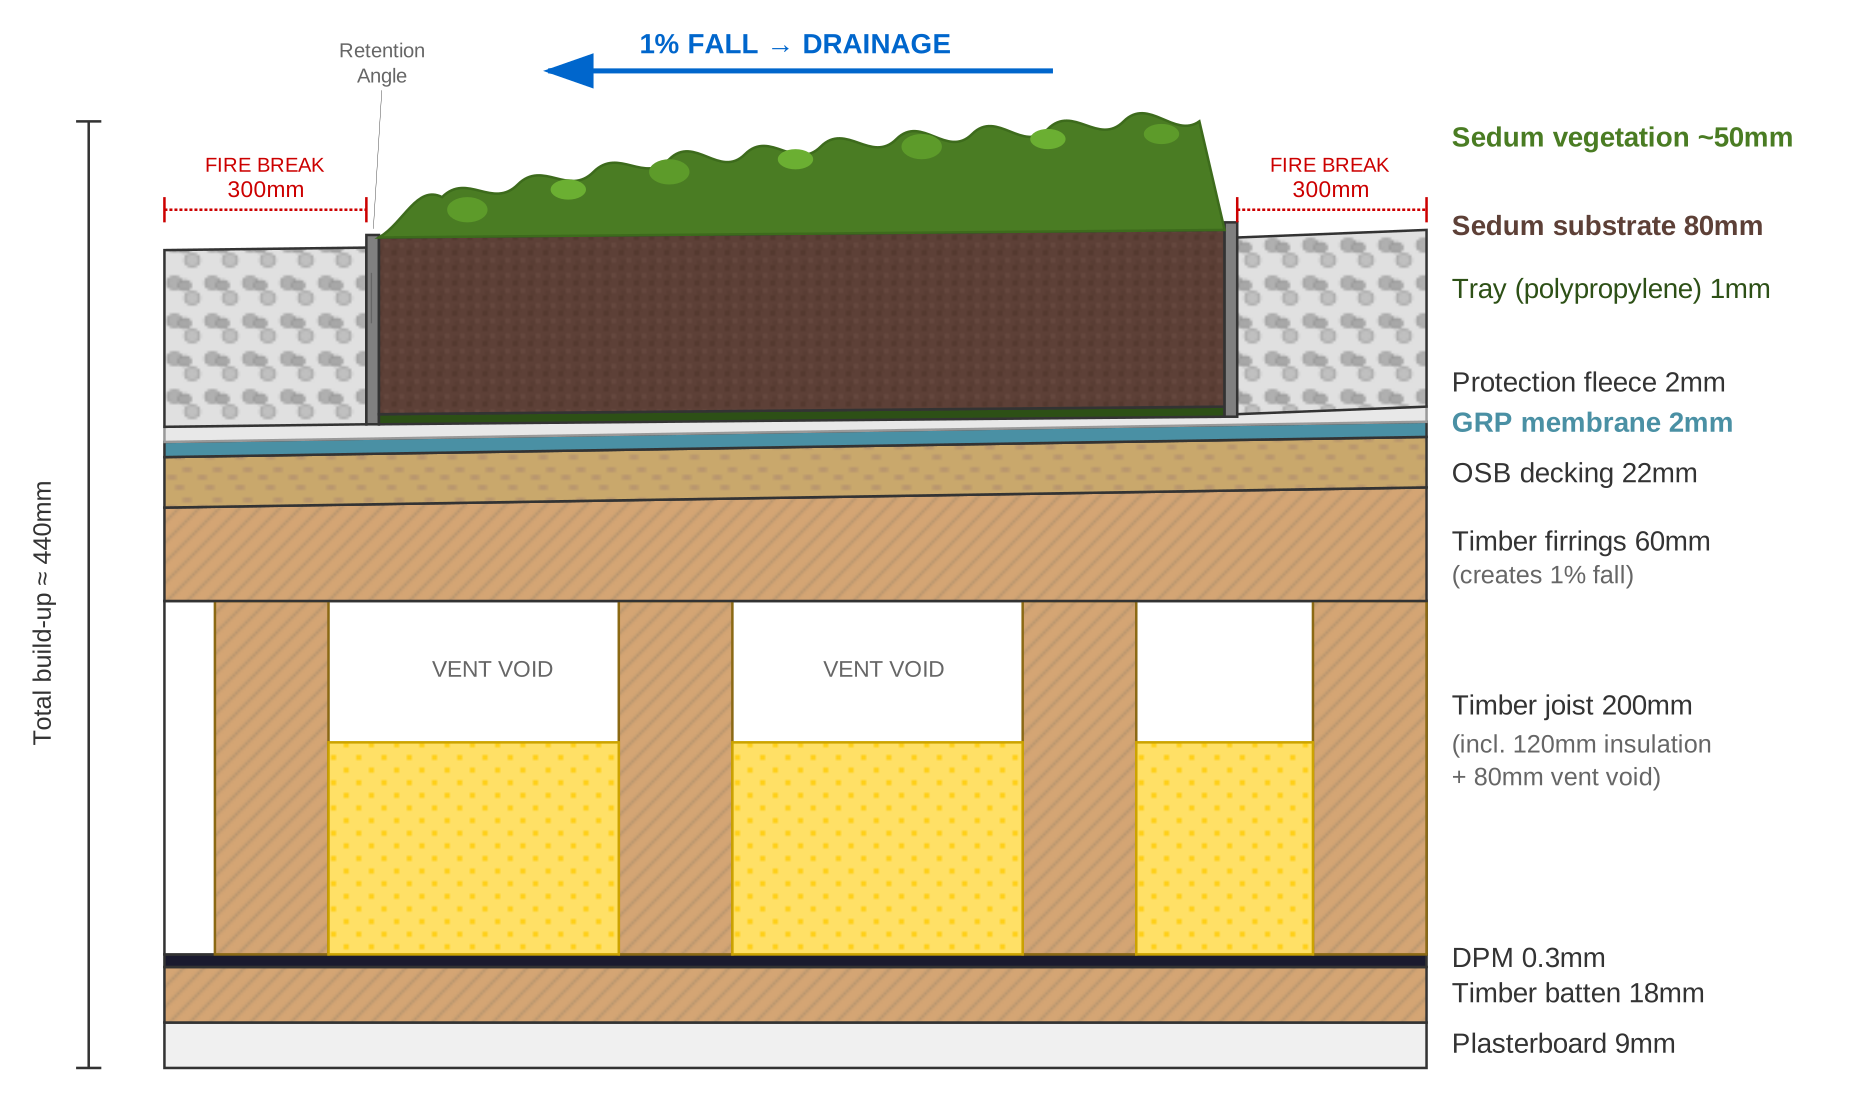
The planning permission did not merely ask for a green roof. It specified one that had to perform: 80mm of substrate depth, and at least nine species of sedum. Green roof conditions are often waved through with a thin mat of vegetation that dies in its first dry summer. This one was written by somebody who knew that.
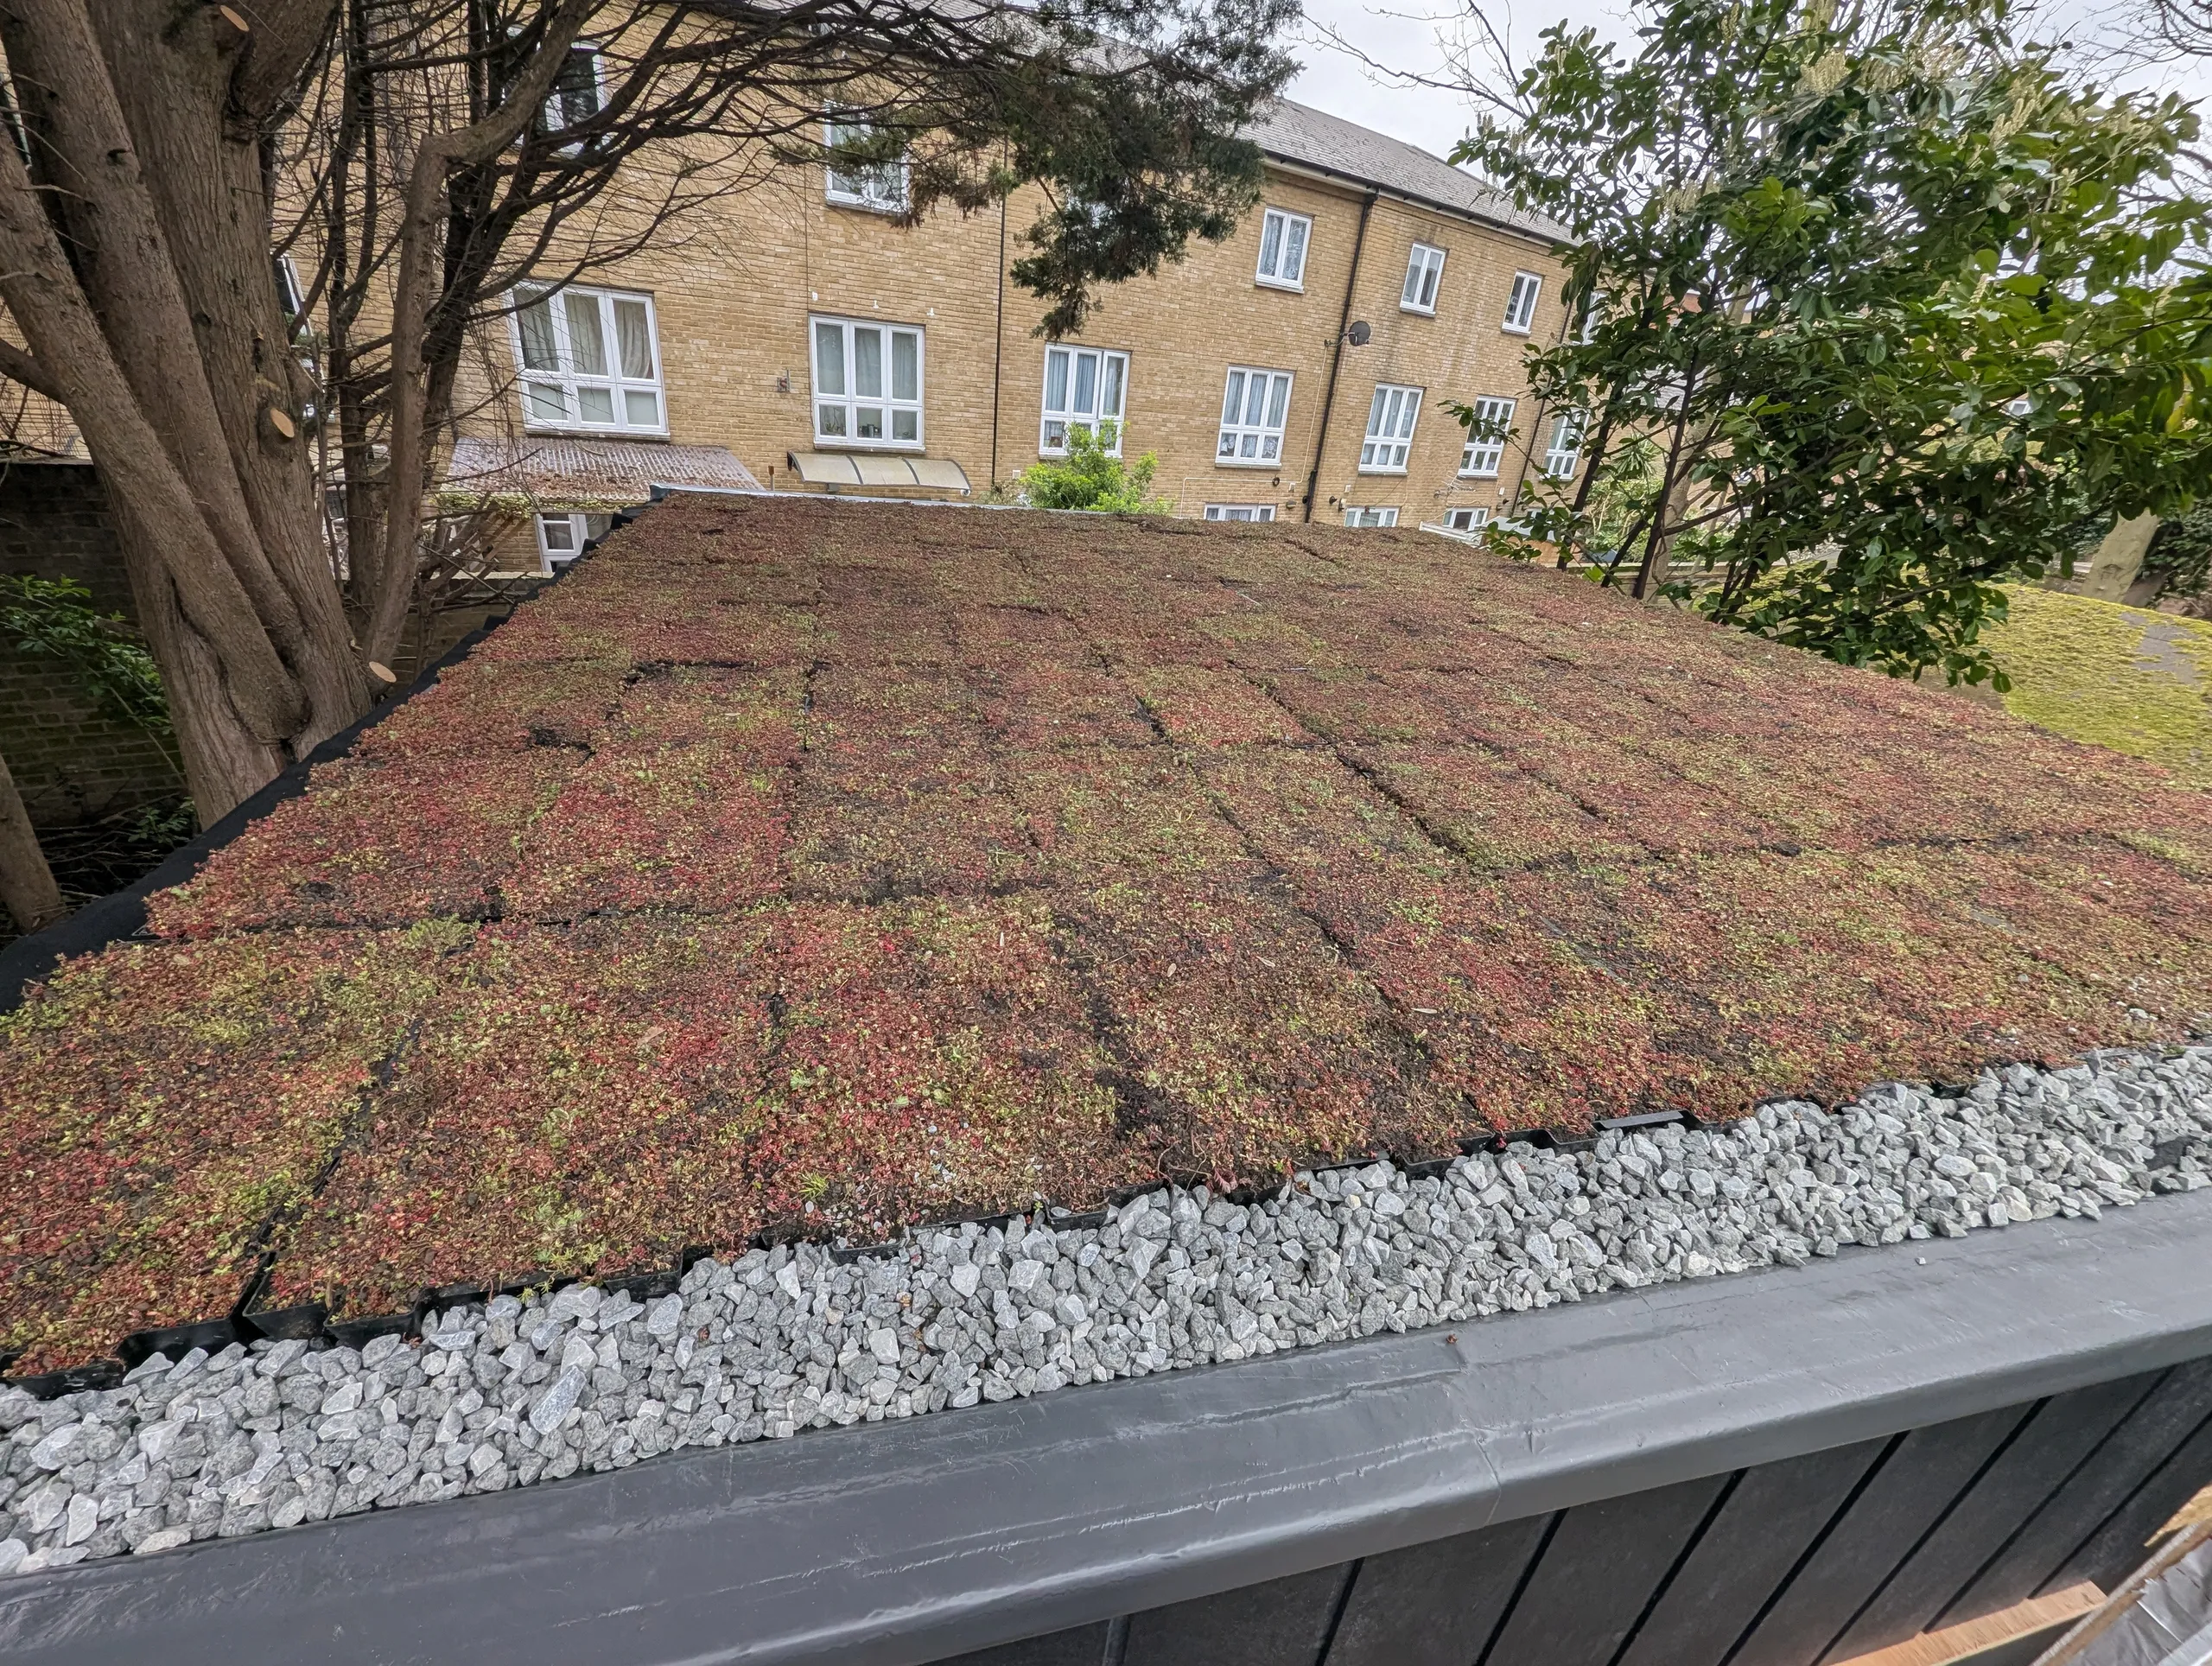
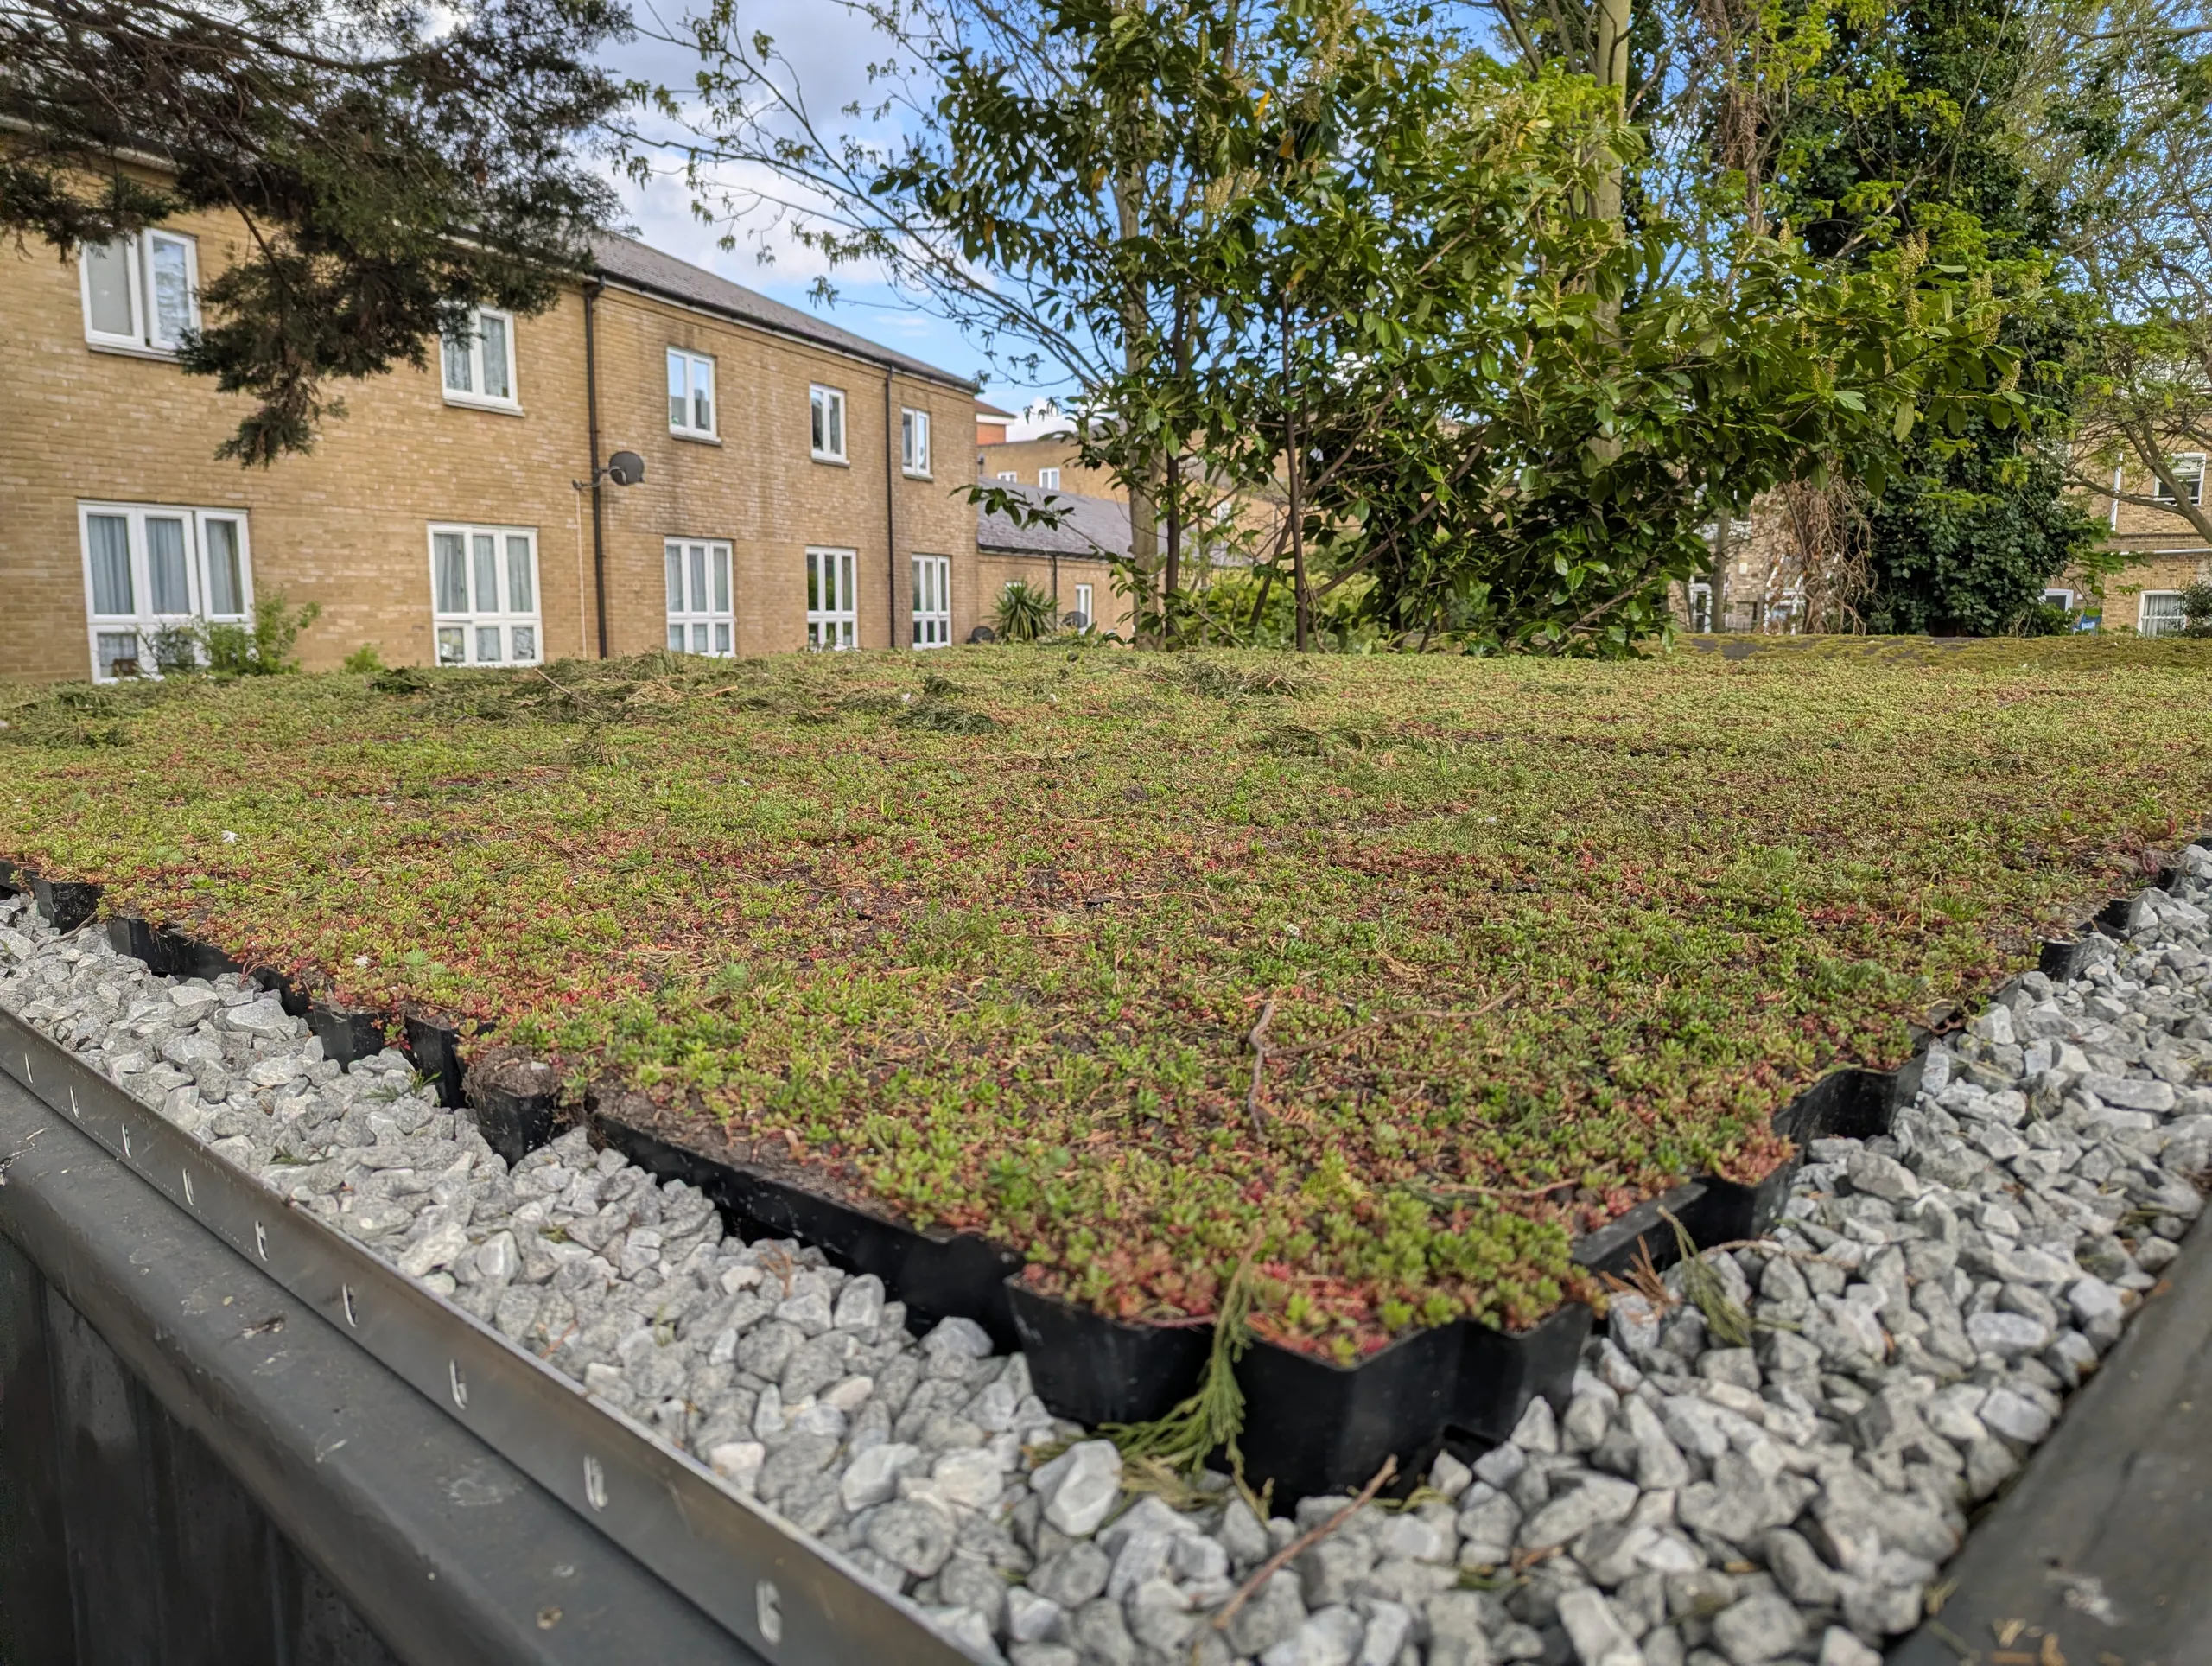
We met the substrate depth exactly and went past the planting requirement: thirteen species rather than nine, in 600 x 400 x 80mm trays, with a 300mm pebble fire break around every perimeter and a 1% fall built into the firrings to keep it draining.
None of those numbers are ours to invent. The roof is designed to the GRO (Green Roof Organisation) Green Roof Code of Best Practice - the 2021 edition, with the June 2023 amendments - which is the industry reference for how a green roof is actually built rather than merely specified. The fire detailing follows the DCLG guidance on Fire Performance of Green Roofs and Walls. That is where the 300mm pebble breaks come from: vegetation is fuel, and a break at every perimeter is what stops a roof fire from running.
It is worth noticing how neatly that dovetailed with the wider fire specification. The building already had to be substantially non-combustible because of its size. Putting a living, burnable layer on top of it is exactly the sort of thing that could have undone that - and it is the reason the breaks, the root-resistant membrane and the substrate depth are all specified together rather than picked one at a time.
Three Tonnes That Had to Go Somewhere
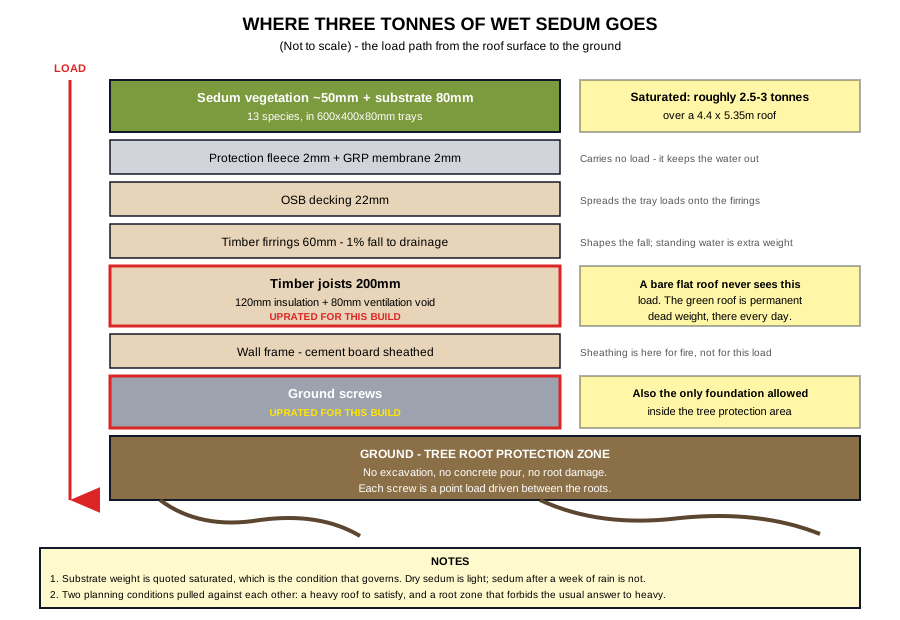
Eighty millimetres of substrate sounds modest until it rains. Saturated, the planting across this roof is somewhere around 2.5 to 3 tonnes of wet biomass - and unlike snow or a person on a ladder, it never goes away. It is permanent dead load, sitting on the building every day of its life.
A roof built for a bare membrane will not carry that. So the load had to be followed all the way down and everything in its path uprated: deeper joists in the roof to carry it across the span, and extra support in the foundation to take it into the ground.
A Tree We Could Not Touch
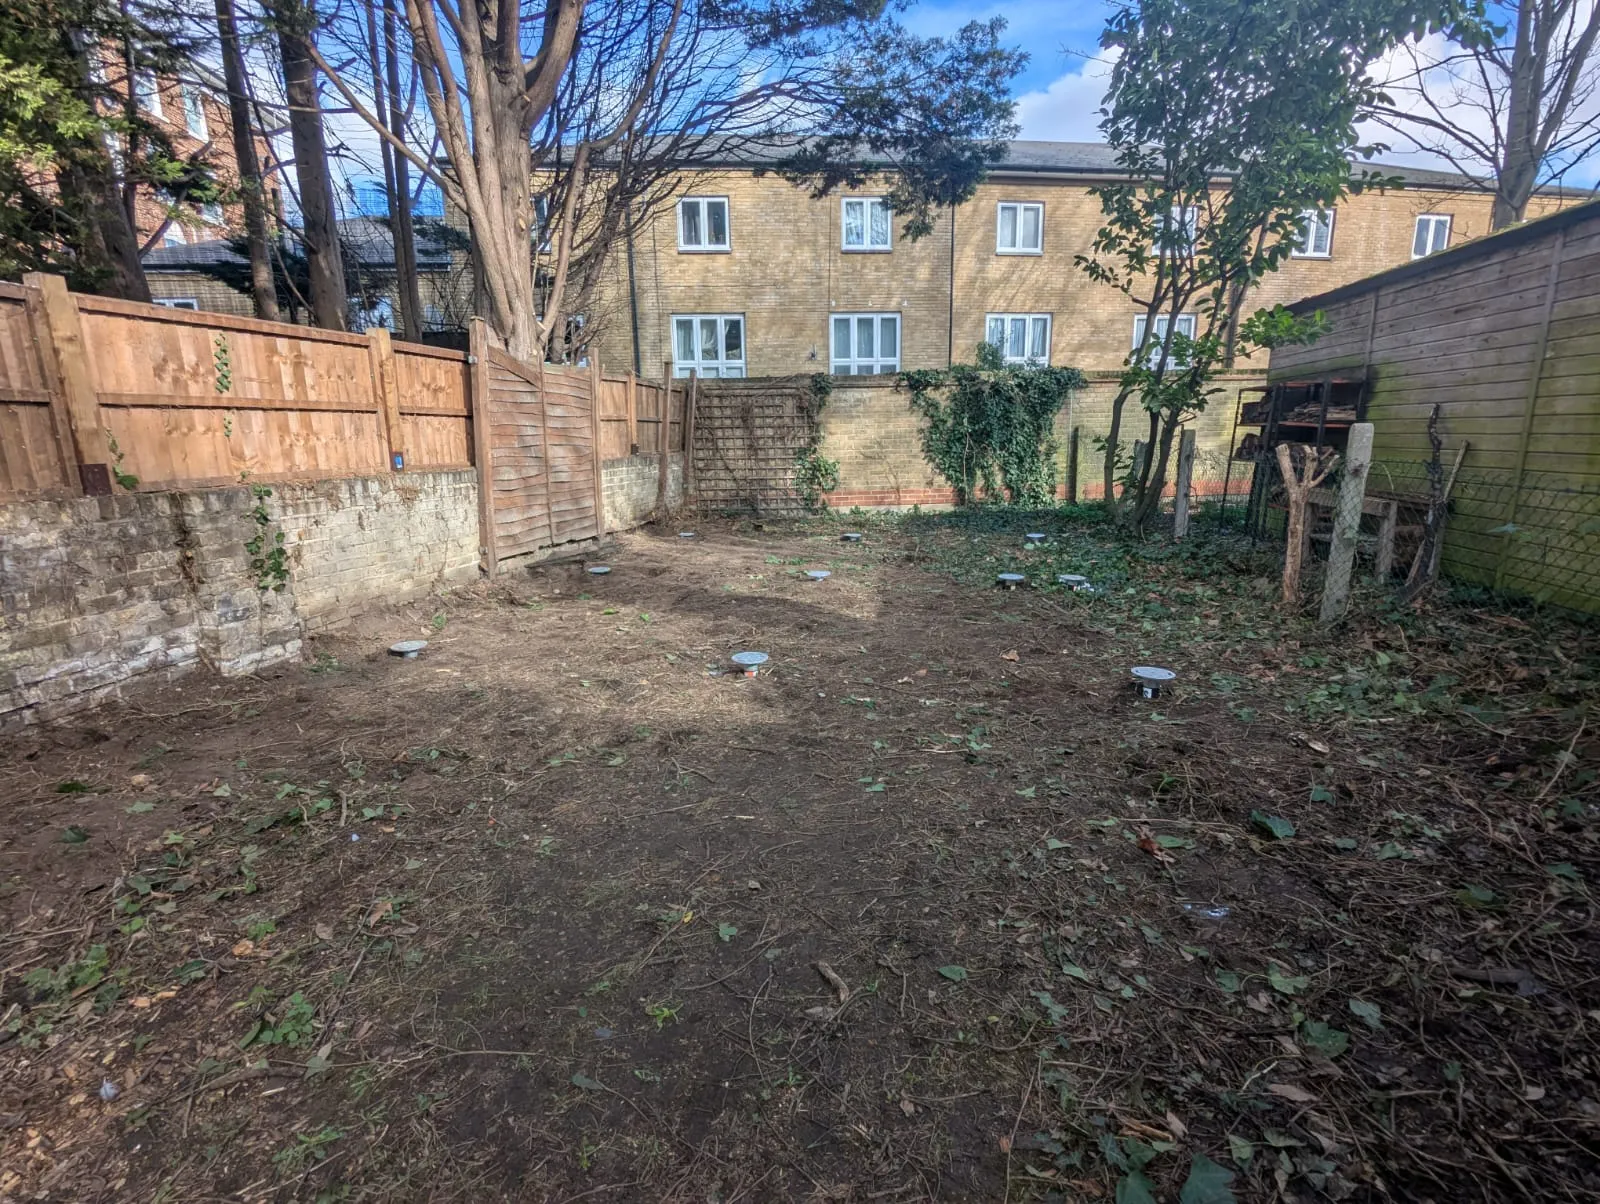
The room sits under the shade of a large protected tree, and the planning conditions required a non-intrusive foundation that would not damage its roots. This is the one constraint on the project where our standard answer was already the right answer.
Ground screws need no excavation and no concrete pour. Each one is driven as a point load rather than a trench cut through a root plate, which is precisely what a root protection area is asking for. We had a heavier building than usual to support, on a foundation type chosen for its light touch - and during installation we were lucky: not one screw position ran into an actual root.
And Then: No Way In
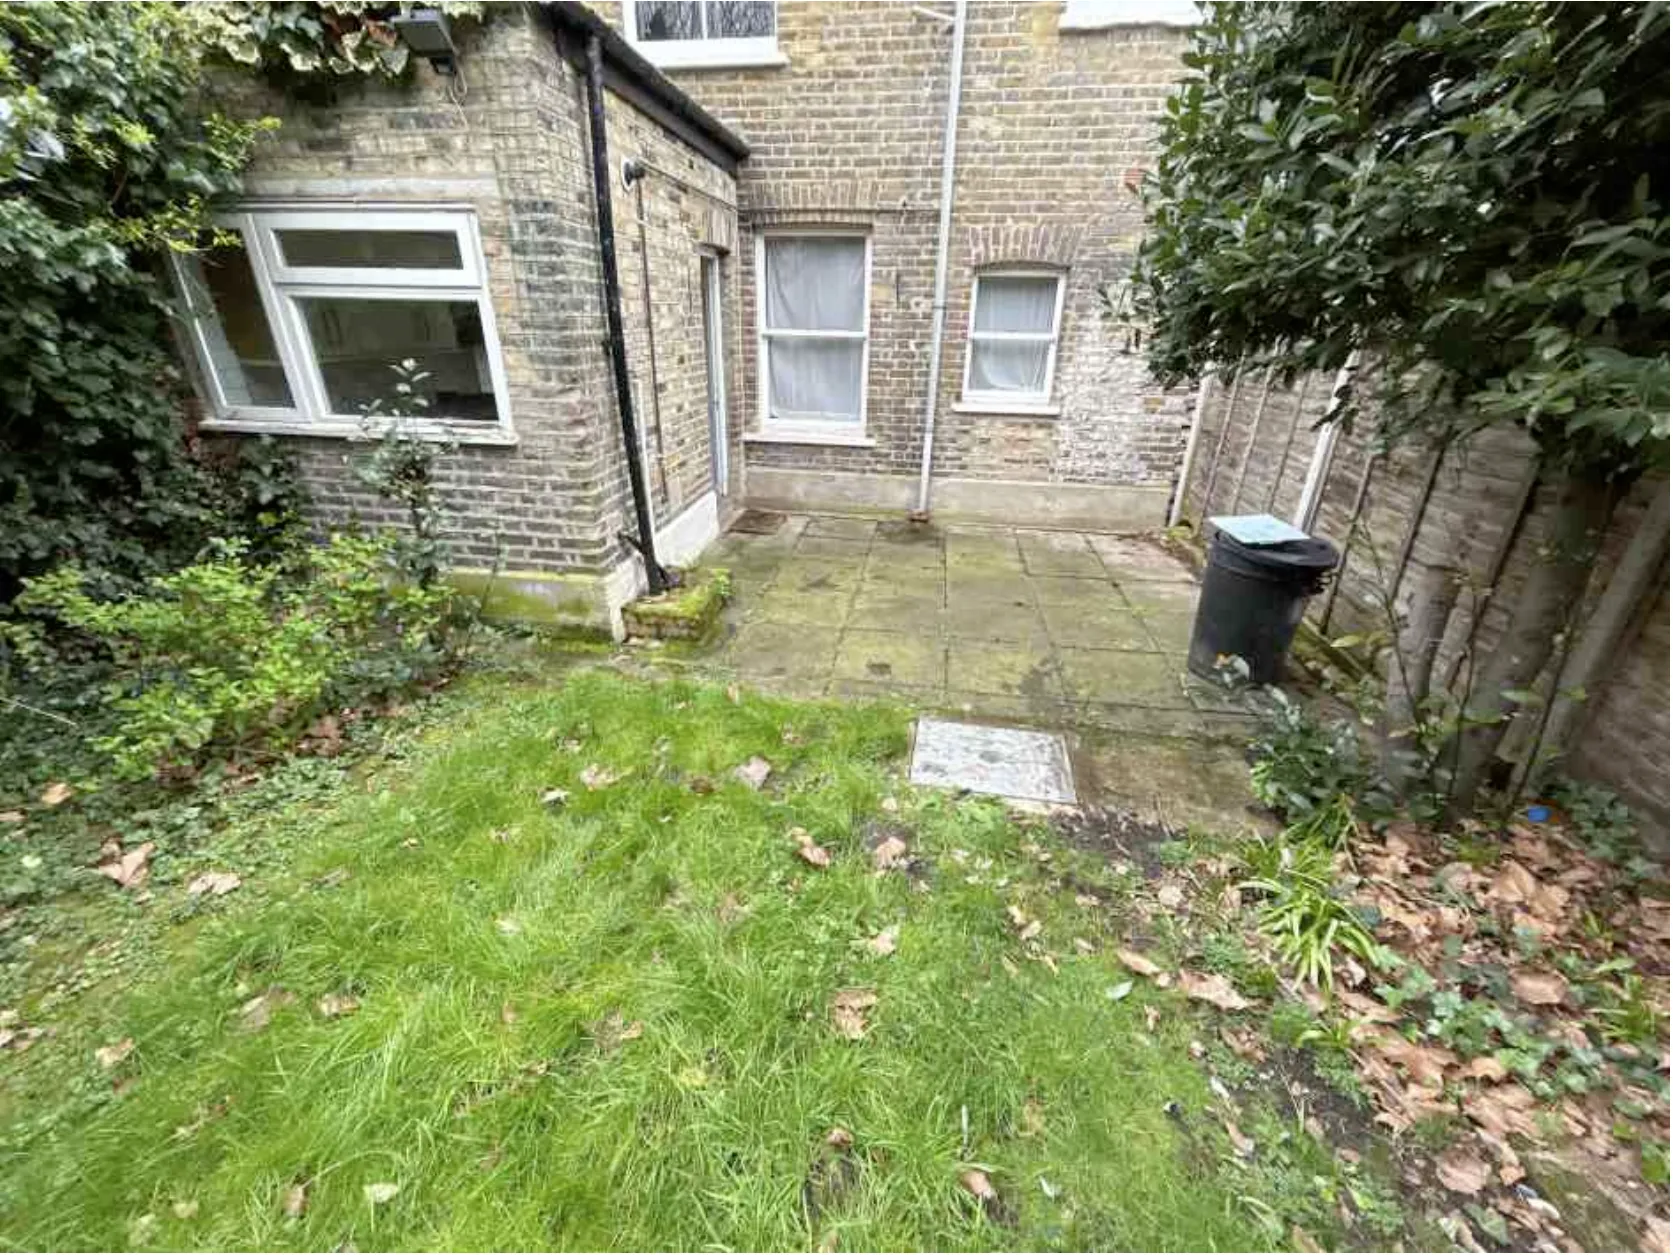
If the planning constraints were not enough, the site had one more. The back garden is spacious and very long. It is also completely landlocked. There is no side return, no rear alley, no gate - the only route from the street to the garden runs through the middle of the house.
And this is 19th-century construction that has never been materially altered, which means the path through it is exactly as narrow as it was in 1880. Internal doors 1.9m high. A main door 720mm wide. Corners that were never designed for anything longer than a sofa.
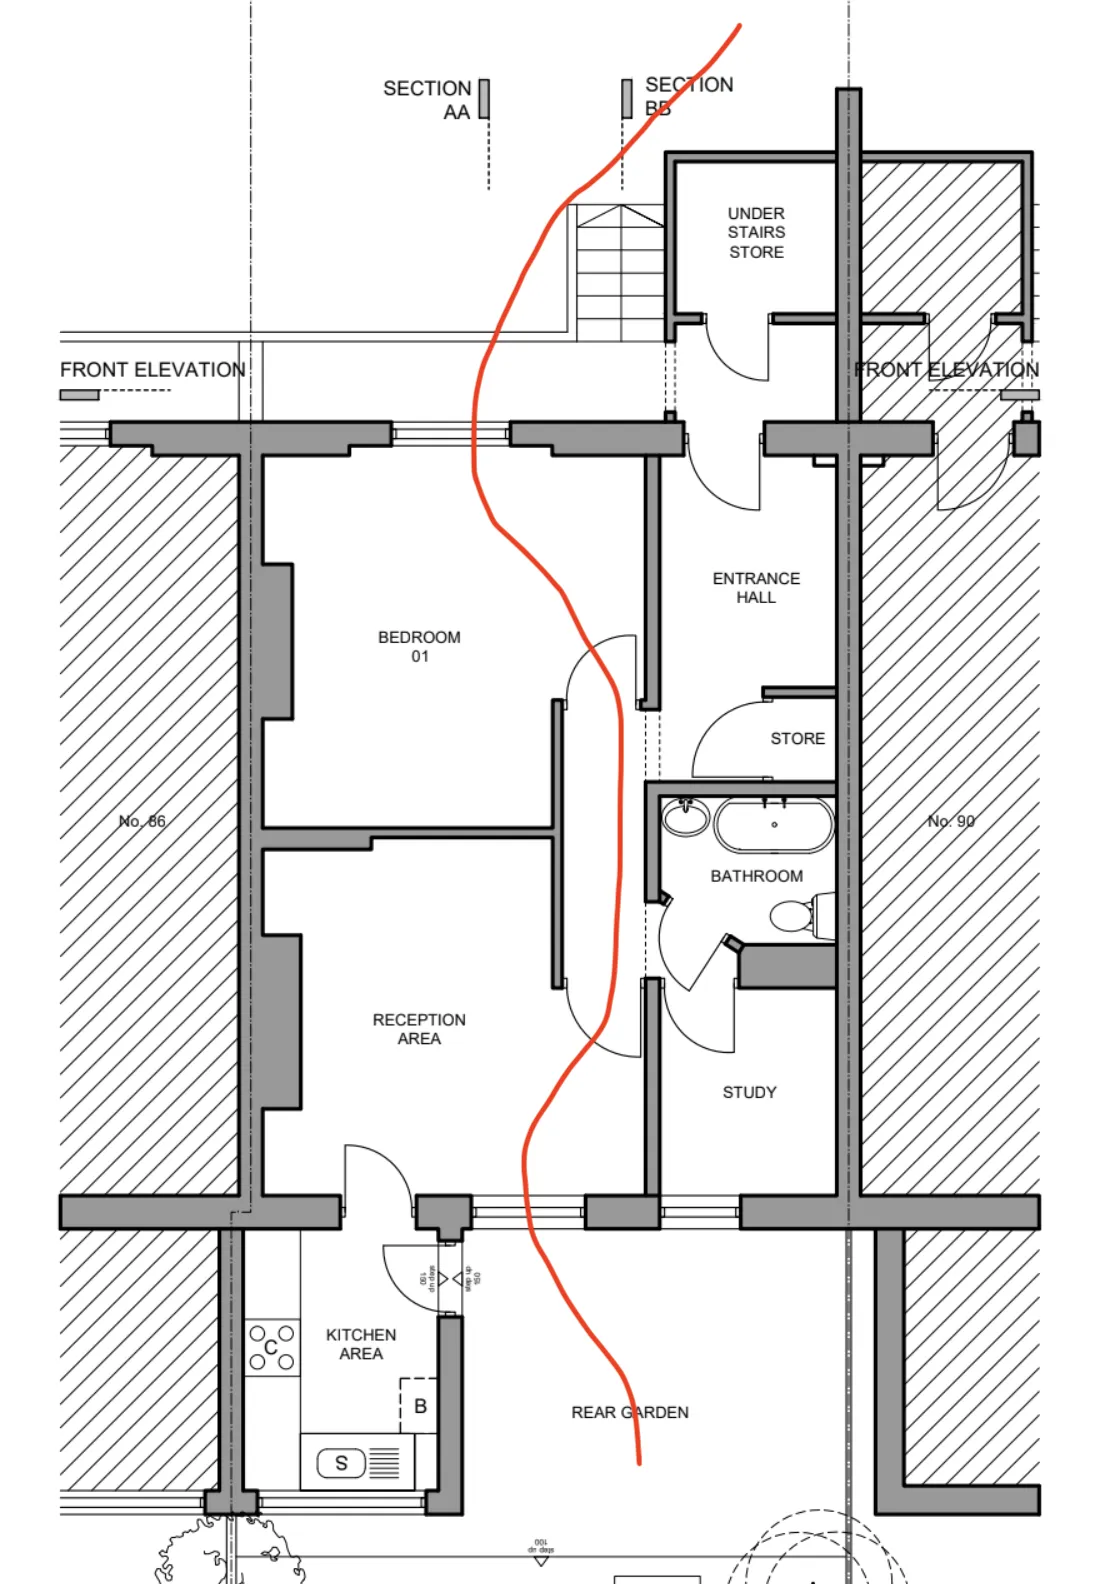
We looked at the alternatives properly. Craning the parts over the roof of the house and into the garden was possible. So was going in through the neighbouring property. Both were more intrusive, more expensive and slower than what we settled on, which was this: take out two windows.
One sash window at the front of the house, one at the back. Sashes out, glass out, and each opening gives up around 1.7m of clear width. Then everything - every frame, every panel, every board - goes in through the front window, across the house and out of the back one into the garden.
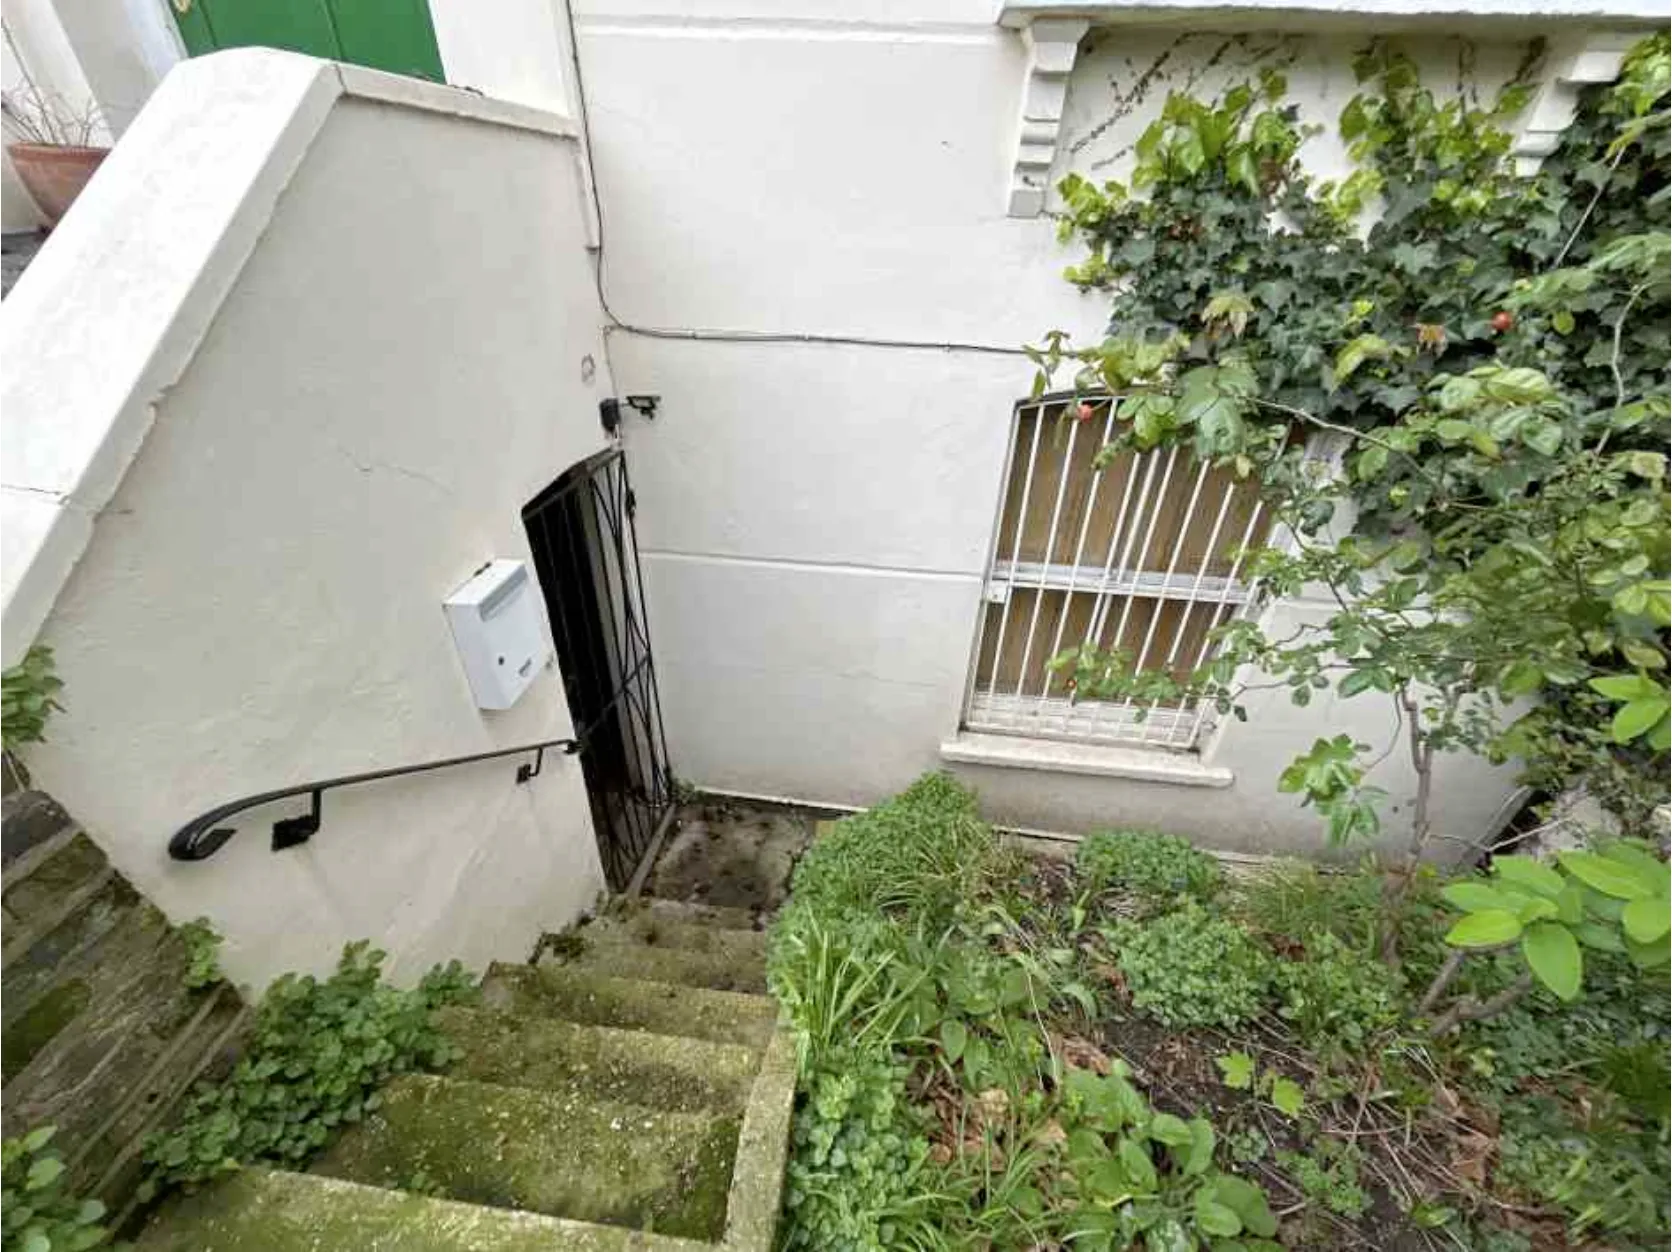
The important part happened long before anyone lifted anything. We measured those window openings during the site survey, and then designed the building around the number. No prefabricated frame was allowed to be bigger than the hole it had to pass through. That is the whole trick: the constraint went into the design, not into the installation day.
It is worth being clear about why this was even an option. The parts were prefabricated to a known size, so we could check them against a measurement taken weeks earlier and know they would fit. A build that arrives as loose timber and gets assembled on site has no such guarantee, and a crane would have been the only answer.
The Result
A listed building, a design we could not alter, a fire specification, a green roof with real conditions on it, a protected tree, and a site with no access. Every one of those was fixed before we started, and none of them moved. The room got built anyway.
The owners were keen to take on the interior fit-out themselves in their own time, so we handed it over with a minimal boarded interior and a fully finished exterior. That is a perfectly good way to buy a garden room, and we are happy to stop at that line when a customer wants to carry on from there.
What they have is a black cube under a tree, with thirteen species of sedum on the roof, standing on screws that never disturbed a root - and not one part of it came through a door.
Has Your Project Been Called Impossible?
A listed building, a planning condition with teeth, a protected tree, a garden with no way into it - we have met all of them, and usually more than one at a time. Tell us what you are working around.